

[Ep-29] Detaching Offsets from a Pegasus Staghorn Fern


After half a year of growing, the price has increased at least fivefold!!
The P.Pegasus staghorn fern I acquired and mounted in April has quickly become a mother! This time I’m sharing a rite of passage for staghorn growers—separating offsets from a staghorn fern. Although these little offsets are still small, the spots where they emerged are very likely to affect the mother plant’s future development and even endanger the offsets’ own growth, so I decided to take the risk and remove them.
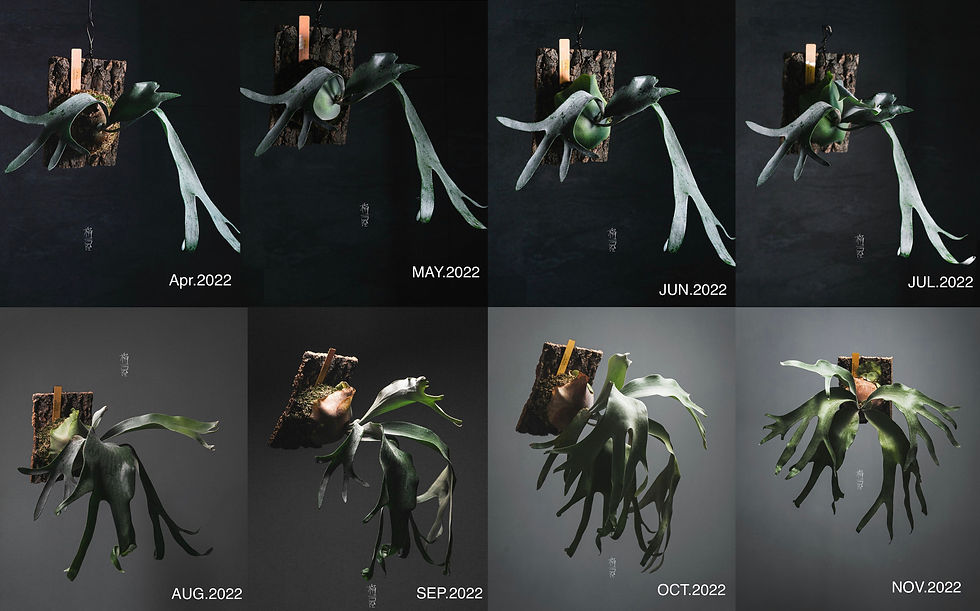
Here’s how it looked from just after mounting to six months later; the plant had grown a lot.
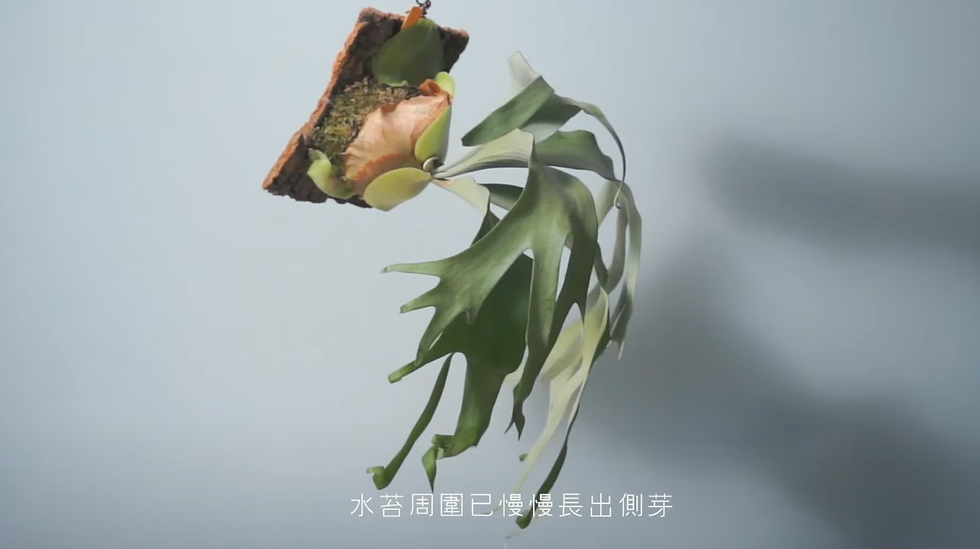
The newly grown sterile (basal) fronds look like they will cover the offsets.
Table of contents
Preparation - Offset cutting procedure - Handling offsets - Placement/environment suggestions for offsets
Preparation
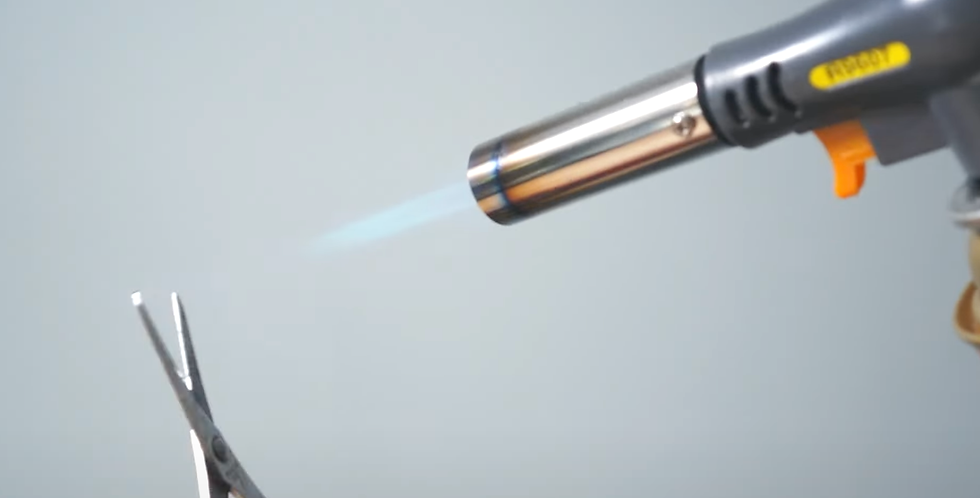
To reduce the risk of infecting the plant’s roots, flame-sterilize the scissors with a torch first.
*Be sure to do this carefully.
Offset cutting procedure
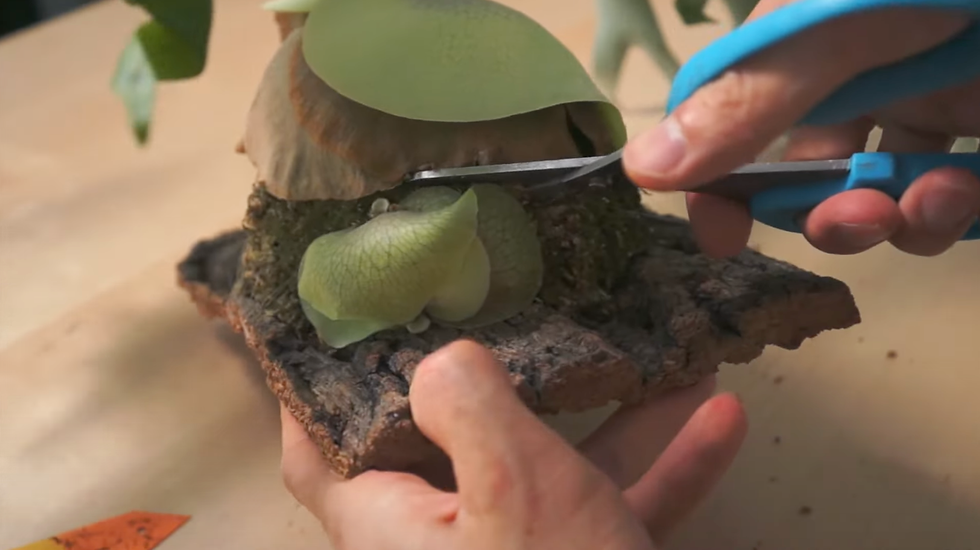
Start by making an oblique cut from this angle.
Offsets gradually grow out from the distal end of the plant’s roots. Separating an offset means removing it from the mother plant.
The process will inevitably injure some roots, so it’s best not to cut too much.
Instead, focus on cutting the clear line that was used to tie down the sphagnum when mounting.
After cutting along the outer edge of the offset’s sterile frond, you can use a tool to pry the offset apart.

But the best tool is actually your hands.
Not only are they handy;
personally I feel your hands can directly sense how loose or tight the offset’s roots are,
so you can control the force better.
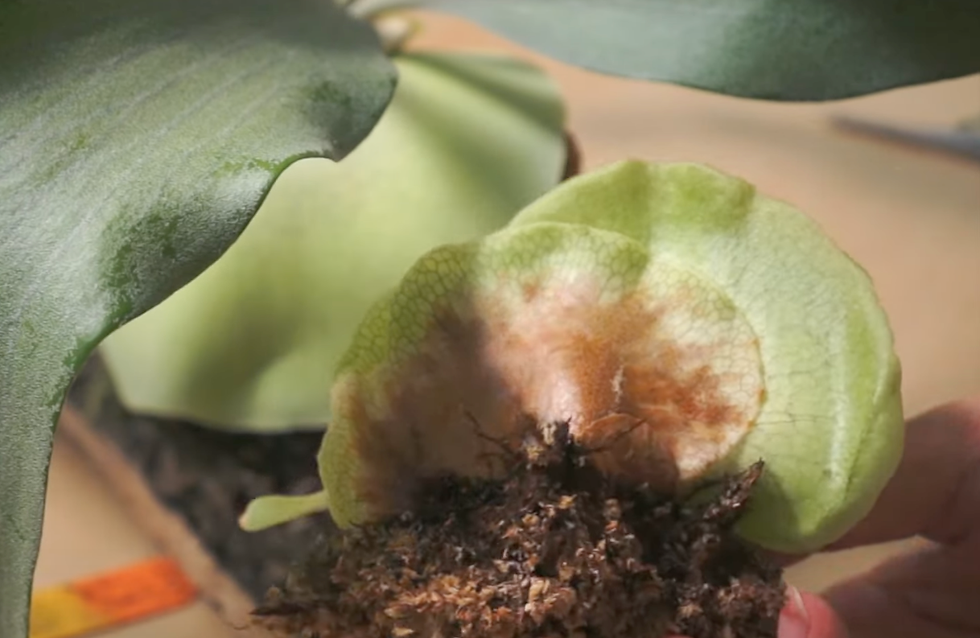
If the removed offset has plenty of roots, it will stabilize and grow more quickly even after separation from the mother.

There’s now a gap that needs to be filled with sphagnum.
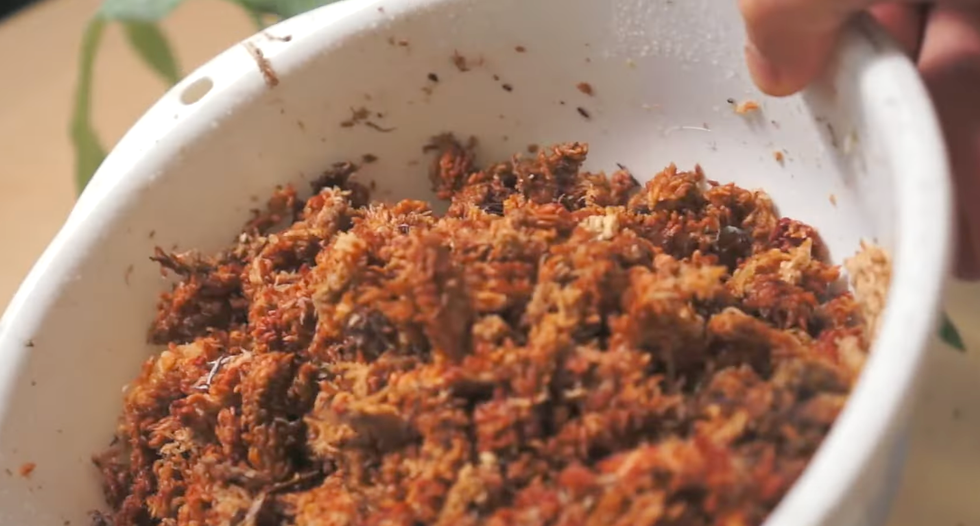
Prepare a bowl of thoroughly wetted sphagnum, and pack the gap full.
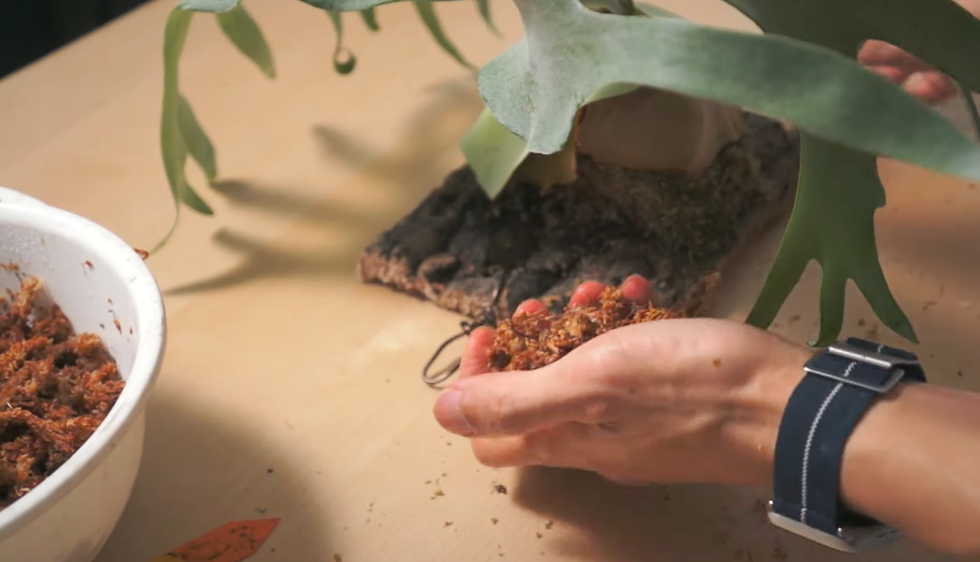

After replenishing sphagnum on both sides, prepare the clear line and tie the sphagnum securely.
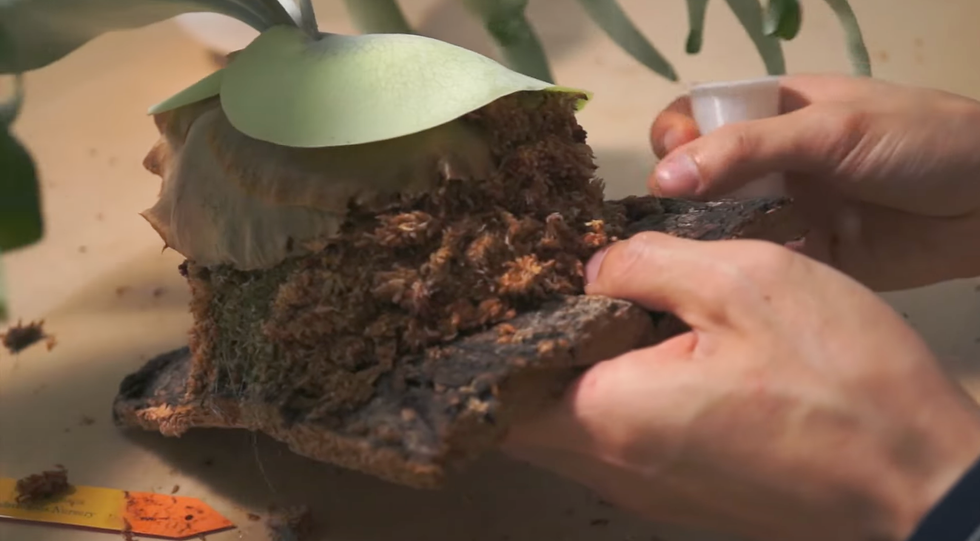
The method is the same as in our previous video “Staghorn Fern Mounting Workshop”.

Set the mother plant aside to rest for a few days; keep the sphagnum slightly moist and out of direct sun, and it will resume growth quickly.
Handling offsets
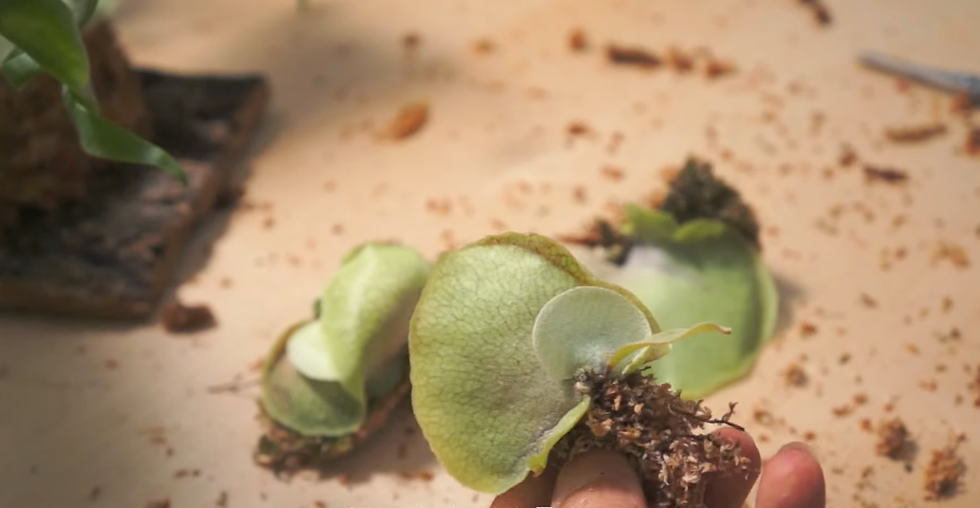
Some recommend waiting until two fertile fronds have emerged before separating them, so that the mother plant can supply the offsets with as much nutrition as possible,
which helps ensure the offsets can grow steadily.
But in my case, if I didn’t remove them, they would be covered by the mother plant’s sterile fronds—nothing would survive in that situation.
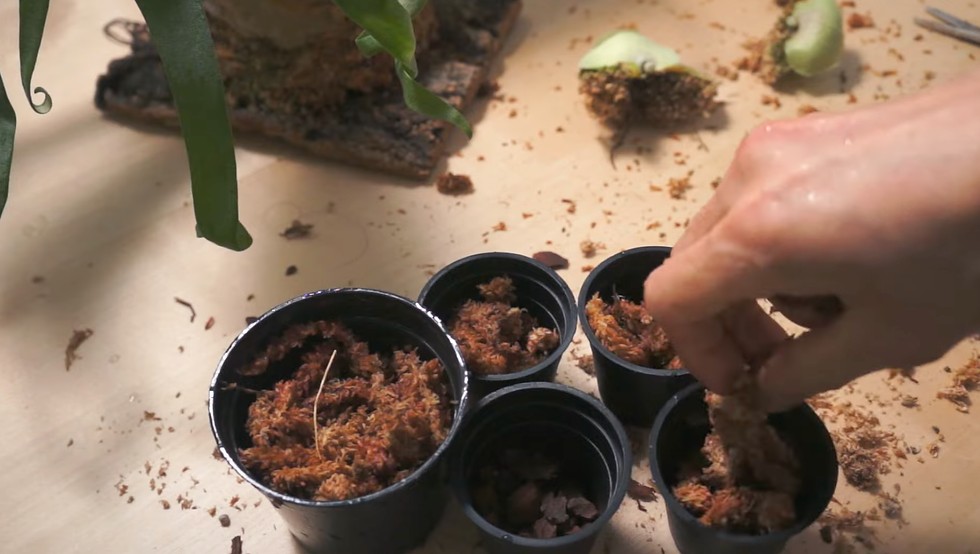
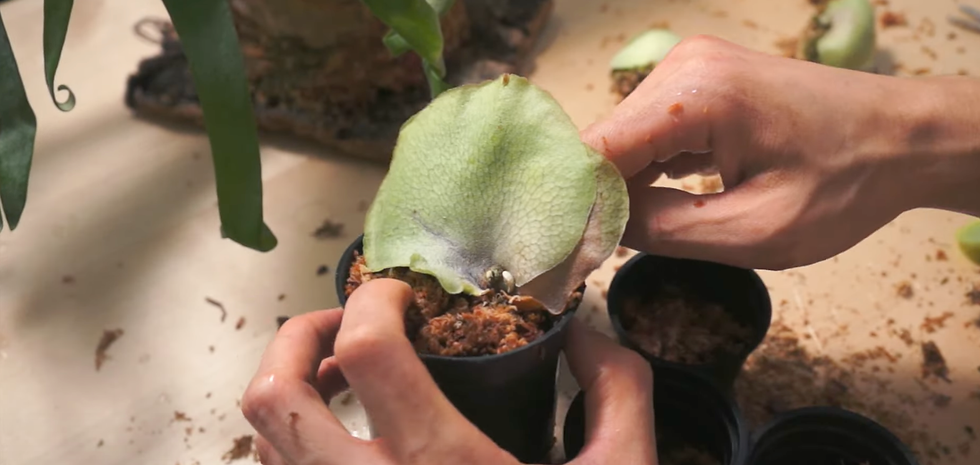
I grabbed a few pots, put some bark chips at the bottom to aid aeration, then added sphagnum,
and placed the offsets in.
To prevent the fertile fronds from growing in erratic directions, try to pot them with the bud oriented upward.
Pack the sphagnum to secure the offsets, and make sure all roots are surrounded with sphagnum so they can fully absorb the moisture evaporating from it.

All set in their pots.
Placement/environment suggestions for offsets
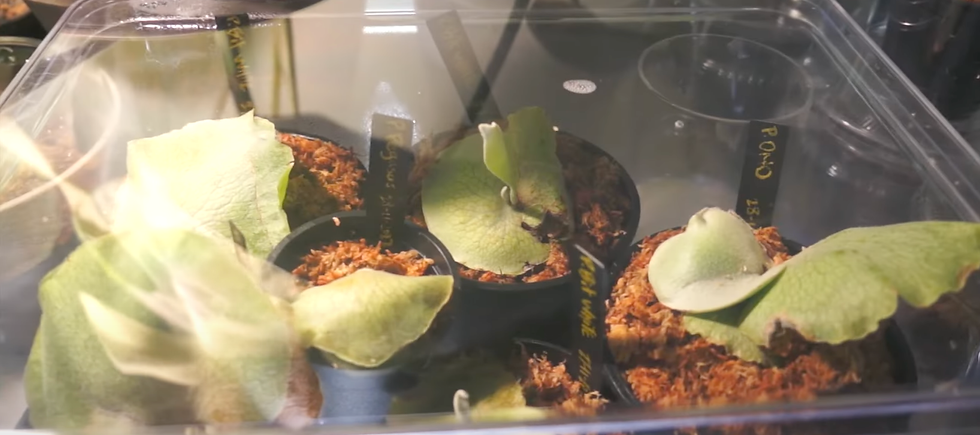
Place them in a spot with low light and relatively high, stable humidity. A closed bin with small vents or a clear display case works—
then you can look forward to their growth.
*Content is for sharing only and does not represent the only or definitively correct method.
If there are questions or mistakes, please leave a comment and discuss amicably.
Light:
We have another article about sunlight:
https://www.greencapsulehk.com/post/ep-04-sunlight-full-partial-shade)
Also note that distance from the window makes a significant difference to light levels:
Compared with being right against the window, at 10 cm away the light intensity is already reduced by 70%!

Everyone’s growing environment is different; learn to observe.
For plants, when just brought to a new home, they usually need some time to adapt to the new environment. The closer the environment matches their natural habits, the faster they can adapt. Sometimes, due to the change in environment, plants will instinctively speed up their metabolism to adapt; this can cause some leaf drop, which is normal. Observe the plant’s changes.
Taking photos to document is also a good method; you can compare the differences after a period of growing.
You’re also welcome to share plant photos to our Facebook Group: https://www.facebook.com/groups/5258158664267819/?ref=share
Thanks for reading to the end!
We update articles monthly; if you find them worth referencing, please go to the bottom of our website to register by email and subscribe to our updates for free.
Subscribe to our updates for free.
If you have plant questions, you’re welcome to book us:
Or
tap the image to join our “Planting Study Space”.
On the official site (you need to become a member first, then follow the link to apply to join): https://www.greencapsulehk.com/groups

For the Facebook Group: https://www.facebook.com/groups/5258158664267819/?ref=share

<< Click here for our YouTube Channel >>

----More videos of plants and potted design works are continuously being updated----
Learn about the Platycerium Mounting Workshop:
Platycerium Mounting workshop:
https://www.greencapsulehk.com/service-page/platycerium-mounting-workshop?referral=service_list_widget
Choose a moss bonsai workshop you’re interested in, sign up, and come to our studio to explore together!
For more about mosses and bonsai, you would like to come and join our workshop:https://www.greencapsulehk.com/workshop
Latest works and workshop info, please click:
Stay close with us:
https://www.instagram.com/greencapsulehk/
There are also moss bonsai materials/kits here. Also can grab some bonsai supplies and DIY kit from here:
https://www.greencapsulehk.com/shop

Comments